
Table of Contents
| 1. Creating the world |
| 2. Buttons and Procedures |
| 3. Sliders and Variables |
| 4. Creating Turtles and Patches |
| 5. Making the Model Go |
In this practical, we'll bring everything you've learned together and build a new model from scratch. Lots of the content for this part has been adapted from directly from the official Netlogo tutorial: http://ccl.northwestern.edu/netlogo/4.1/docs/tutorial3.html (part 3).
The model we will create is very simple. It will have some turtles in it (well, sheep actually) who will wander around aimlessly eating grass. Practical 3 will then extend the model to make it more interesting .
To start, move on to the first part: 1. creating the world.

Before creating a model, we need to configure the world, or environment. We do this by specifying how large we would like the world to be (how many patches) and by specifying how the coordinate system works.
The first thing we need to do is to set the size of the environment that we want to use.

You should see a window that allows you to configure the model world.
min-pxcor) to zero.max-pxcor and max-pycor)
to 20. This will give us a 20x20 cell grid.That's all you need to do to prepare the environment. Check that you understand the questions below, and then move on to part 2 to create a button.
If you're not sure about any of the questions below, have a look at the NetLogo interface guide, particularly the section on views.

In this section, you will create a button that will be used to set up the model.
In the new menu that appears you can specify what the button should do.
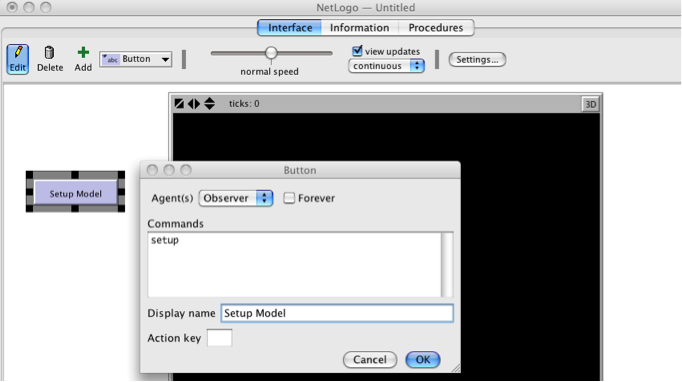
You can see that the button is red which means it refers to a procedure (method, i.e. we will tell it to do something) that hasn't been created yet. We'll do that now.
One thing that hasn't been covered yet is procedures. These are a way of grouping several commands together that perform a common task. One example is setting up the model: there will probably be some commands to create the turtles, some for the patches, and some to create other parts of the model. We can group these all together in a single procedure.
We are going to create a new procedure called 'setup'.
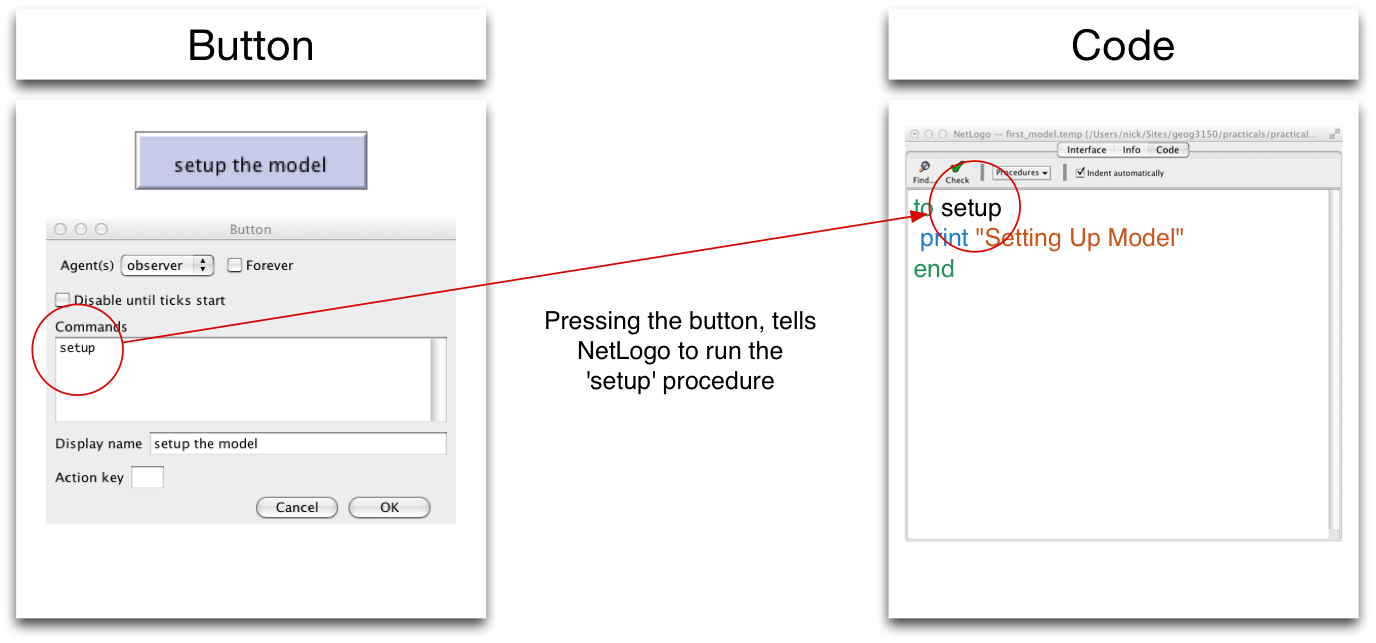
                to setup


                     print "Setting Up Model"


                end
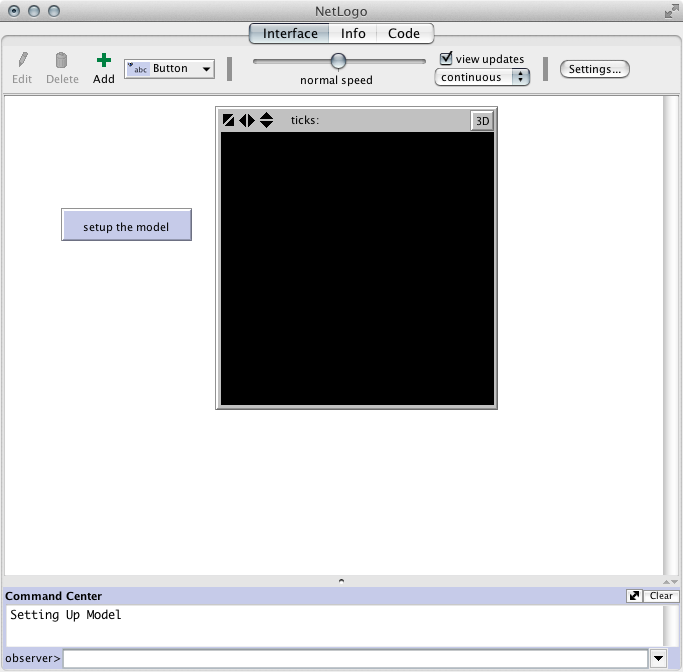
The code above does three things:
to setup) says whatever comes next will be part of
a procedure called 'setup'.print "Setting Up Model") -
it will print a message to the command centre.end) says that we have come to the end of the
'setup' procedure. Any more commands that come afterwards are not part of
'setup'.It's worth having another look at what is going on above, as this goes to the heart of how NetLogo works. The first thing that we did is create a button. When creating it, we told the button that if someone presses it, it should try to run a procedure called 'setup'.
Then, in the Code tab, we created a new procedure called 'setup'. So, if someone presses the button, all the commands that are part of the 'setup' procedure will run. The image below illustrates this graphically.
Have a go at the activities below. When you're comfortable that you can answer them, move on to part 3.
You've now seen how buttons and procedures work together. Now, you will see how sliders connect up to variables (if you need to refresh your memory, there is information about variables in the lecture or in the previous section).
initial-number-of-turtles. This is the name of the
variable that we can use in the Code tab shortly.0. This is the smallest number that the slider will show.1. Moving the slider very slightly will increase or decrease
the number by 1.100. This is the largest number that the slider can show.10. The default value (the number that the slider starts with).
Now the slider is ready. Next we'll go back into the model code and make some improvements so that it does something more useful.
That was easy enough. In the next section we'll look more closely at how we can use the slider in the model. But first, have a go at the activities below.
These activities will check that you're familiar with how to write procedures. Before starting, type the following code into the Command Centre:
create-turtles 10 [ set xcor random 10 set ycor random 10 ]
This will temporarily create ten new turtles - we need these to see if your procedures
are working properly. For the following questions, write the required code in the
'Code' section of NetLogo, and then run your commands from the Command Centre by simply
typing the name of the procedure. For example, if you have created a procedure called
do-something you simply type 'do-something' in the Command Centre to run
it.
ask
command as we did in the last practical). Once
you have written the procedure in the 'Code' tab, type 'make-blue' into the Command
Centre to run it.
fd 1
tells a turtle to go one step forward).
In this part of the practical, we will start to create the fundamental components of our model: the turtles and the patches.
setup procedure. We will now
improve it so that it does something more useful.setup function so that it reads:
                    to setup


                         print "Setting Up Model"


                         clear-all


                         setup-patches


                         setup-turtles


                    end
The clear-all command tells NetLogo to reset everything ready for us to
create a new model. The other two lines (setup-patches and setup-turtles)
call two new procedures that will contain commands to set up the turtles and patches. We
could put these commands directly into the setup procedure, but by putting them
into their own separate procedures it makes the model code easier to understand.
end
of the setup function.
                    to setup-patches


                         ask patches [ set pcolor green ]


                    end


                    to setup-turtles


                          create-turtles initial-number-of-turtles


                          ask turtles [


                           set shape "sheep"


                           setxy (random 20) (random 20)


                           set color blue


                          ]


                    end
The code above should be fairly self-explanatory. The first procedure
(setup-patches) does one thing: it asks all the patches to change their
colour to green. This means that each patch will represent a square of grass, ready
to be eaten by the turtles.
The second procedure (setup-turtles) creates the turtles. There are some
new commands in there that you wont be familiar with:
create-turtles makes a number of new turtles. Instead of saying
exactly the number of turtles that we want (e.g. 10), we use the value from the slider
(initial-number-of-turtles).ask turtles is used to run some commands on the turtles that
have just been created. Notice that the commands we want to send to the turtles are
enclosed in square brackets ([ and ]).set shape "sheep" uses the set command to change the
shape of the turtle. This is the same as changing other turtles variables such as
their color. Have a look
here if you would like to see a list of all the shapes that are available.setxy (random 20) (random 20) is a quick way of setting the turtles'
x and y coordinates. The random 20 means choose
a random number between 0 and 20. This is exactly the same as using two commands,
one after the other:
set xcor (random 20)
set ycor (random 20)set color blue makes our sheep blue. 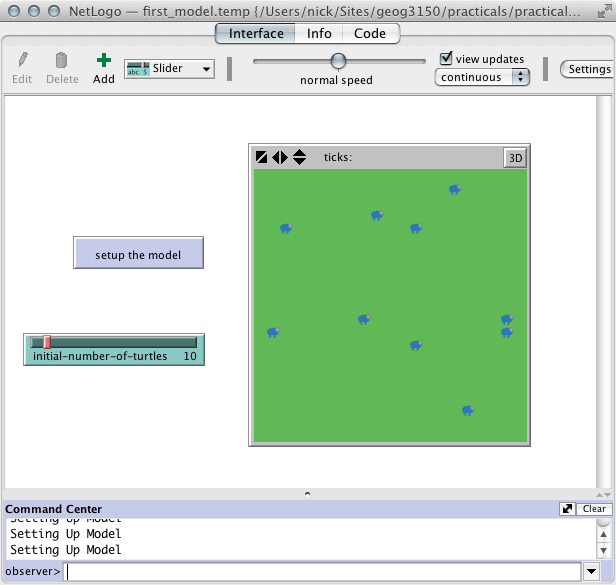
Now, try going back to the 'Interface' tab. If you have made any mistakes with the model code, NetLogo will tell you about them. Otherwise you will see the main interface again.
That's almost everything. To finish the basic model, move onto the final section to get the sheep moving around the environment.
ask
command as we did in the last practical).
fd 1
tells a turtle to go one step forward).
To finish the model we need to create a go button. This will start the
model running.
go. This will make the button start a procedure called 'go'.
You can give the button any name you want (typically people use 'Go', but you could use
'Begin model' or whatever, it doesn't matter).
                    to go


                      ask turtles [


                       rt (random 360)


                       fd 1


                       if pcolor = green [


                        set pcolor brown


                       ]


                      ]


                    end
There are some more new commands in there, but they are quite easy to explain.
go procedure does is run ask turtles.
This means that all the commands in between the square brackets will be sent to the
turtles.rt (random 360) tells the turtles to rotate a random amount from 0
to 360 degrees.fd 1 means move forward one step in whatever direction that they are
facing.
                    if pcolor = green [


                          set pcolor brown


                    ]
mean "if the turtle is standing on a green patch, then make the colour of the patch
brown. Notice the use of square brackets to make it clear which commands should happen
if the colour of the patch is green. This basically makes it look like the turtle
(or sheep, if you prefer) has just eaten all the grass on that square.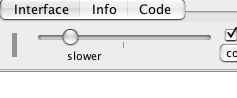
That's it! You now have a very simple simulation with some turtles that will move around and eat grass. With a few small additions to the code it is possible to have grass that grows and can be eaten, turtles that die if they do not have enough to eat, and a graph to show how many turtles are alive. We'll look at these changes next time. If you have the energy, you can move straight on to practical 3. Or, if you are ready to either cry or destroy the computer in front of you, go and have another cup of tea.